Croptober compresses a season into a few weeks. Outdoor plants finish together, a change in the forecast can rewrite the harvest plan overnight, and drying space, labor, sanitation, and batch separation suddenly matter as much as the flower itself.
In This Article
- How to judge harvest readiness without leaning on a single marker
- When wet, dry, or hybrid trimming makes operational sense
- How to build and monitor a controlled dry space
- The defensible drying endpoint, plus a labeled home-grower proxy
- What curing actually does, and how to vent by measurement
- Storage, batch records, and a fast troubleshooting table
- A scannable Croptober checklist
Whether you are bringing down an outdoor crop, working through a greenhouse, or harvesting on a recurring indoor schedule, the goal of any cannabis harvest-to-cure process is the same: protect the quality that is already in the flower.
Most of that quality was decided before the first cut. Density, resin coverage, and the terpene content behind your flavor profile are built during bloom. Drying and curing either preserve that work or waste it.
There is no universal calendar here and no ritual that works on every cultivar. What works is a controlled cannabis post-harvest process built on objective endpoints, cultivar- and load-aware decisions, clean rooms, and disciplined storage.
This Croptober harvest guide walks the post-harvest process in order, from harvest readiness through trim, drying, curing, storage, and troubleshooting. If you want the foundational version first, start with our guide to drying and curing cannabis.
Regulatory note: This guide is intended for general informational purposes. Facilities operating under GACP, GMP, or other applicable regulatory systems may have additional validated procedures, product specifications, documentation, testing, and release requirements. Where such requirements apply, follow the facility’s approved procedures and applicable regulations.
Step 1: Harvest for the Intended Result, Not the Calendar
Start with what you already know about the cultivar. Its flowering window, its behavior in previous runs, and the product you are selling toward tell you more than any single visual cue.
Then confirm with several markers at once: overall flower maturity, stigma progression, and trichome observations taken on the flower bracts rather than on sugar leaves, which mature at a different rate. Our harvest time guide covers those markers in detail.
Treat every one of them as an estimate. Research using liquid chromatography-mass spectrometry and digital image analysis supports stigma color transition as a useful approximation of maturity, but peak cannabinoid concentrations were genotype specific. That is why this guide does not publish a universal amber percentage. A ratio that fits one cultivar can cost you weight and flavor in another.
Weather can override all of it. For outdoor or light-deprivation crops facing rain, dew, or a humidity spike, an early harvest of clean flower beats a later harvest of infected flower. Yield matters, and so does harvesting for maximum yield, but a rejected batch yields nothing.
Your decision: Set a harvest window from cultivar history, confirm it with multiple markers in the days before the cut, and stage the harvest into batches that can be tracked separately all the way through storage.
Pro note: Assign a batch ID at the cut. Record cultivar, harvest date, room, wet weight, trim style, and dry-space position. Every troubleshooting decision you make later depends on that record existing.

Step 2: Choose the Trim Workflow Before You Cut
Wet trimming removes leaf while the material is fresh. It speeds drying, frees up space, and lowers mold risk when incoming material is damp. It also demands labor at the busiest possible moment.
Dry trimming leaves the leaf on through the dry. That extra material slows moisture loss and reduces handling while the flower is at its most fragile. It needs more hanging space and more careful handling afterward.
Hybrid trimming splits the difference: a light pre-dry cleanup of large fan leaves, then finishing once the batch is dry.
The research supports a tradeoff, not a winner. In a study on one commercial hybrid chemovar, mild pre-drying trimming produced the highest cannabinoid concentration while post-drying trimming produced the highest terpene content. One chemovar, one experimental setup. Use it to frame your decision, not to settle it.
Weigh five inputs: incoming moisture and mold pressure, flower density, labor available inside the window, hand versus machine trimming, and how much flavor drives the price you get. Our wet or dry trimming guide breaks down the mechanics of each.
Your decision: If terpene retention is the priority and the space can carry the extra load, dry or hybrid trim. If material arrives wet, if mold pressure is elevated, or if capacity is tight, wet trim and get the batch into airflow. Then record the choice with the batch, because it changes how the dry behaves.
Step 3: Build a Controlled Dry

Set the post-harvest space before the load goes in. Darkness first. Light degrades pigments and volatile aroma compounds, so the space stays dark except when someone is working in it.
Sanitize before anything hangs. Clean and disinfect racks, hangers, walls, floors, and fan housings between batches, and replace filters. A dry space is a controlled processing space, and it is also where field infection finishes the job, so it is worth reviewing how to prevent bud rot before the room fills up.
Move air gently and indirectly. Air should circulate around the material without blowing on it. Direct airflow can dry the exterior faster than the core, which creates misleading surface dryness and sets up a failed endpoint or a musty jar later.
Starting conditions, and how to adjust them

Space the load. Crowded racks create wet pockets and stall drying. Load density should match your dehumidification capacity, not the amount of material you would like to fit.
For starting conditions, the conventional slow-dry band cited in the literature is roughly 18 to 21 degrees C, which is about 64 to 70 degrees F, at 50 to 55 percent relative humidity. A drying quality assessment citing that band also notes something more useful: established models for predicting drying endpoints and total drying times do not exist. The band is a starting point, not a universal requirement; regulated facilities should follow their approved drying conditions and specifications.
Adjust from there based on cultivar, flower density, trim style, and batch load. Dense, dry-trimmed flower needs more time and steadier conditions. Small, airy flower dries faster and over-dries faster.
Cultivar response varies too. A trial on cultivar-specific drying using controlled atmosphere chambers reported substantially shorter drying and curing times with volatile terpene content preserved, while traditionally dried material in the same trial showed heavy Alternaria alternata infestation. Results differed between the two chemovars tested.
Avoid an aggressive late-stage humidity drop. Pushing RH down hard at the end to hit a date can accelerate volatile loss and over-dry the outside of the flower before the batch reaches a uniform endpoint.
Whole-plant drying holds moisture longest and buffers swings. Branch or rack drying is faster and easier to manage at volume. Neither one is universally correct, and both work when the room is controlled.
Pro note: Map the space. Place sensors at multiple heights and in the corners, not only beside the door, and log temperature and RH continuously. One sensor at the entrance will tell you a comfortable story about a room that is failing in the back corner.
Your decision: Use a documented starting setpoint appropriate to the material, monitor conditions consistently, and make adjustments according to the applicable process specification.
Step 4: End the Dry With Measurements
The cannabis harvest-to-cure process is only as reliable as the endpoint used to finish the dry.
Water activity, the commercial endpoint
For many commercial operations, water activity is an important quality parameter. Water activity, written as aw, measures how available the water in the flower is for microbial and chemical activity rather than simply measuring total moisture content. It is what governs microbial stability, and it is what a sealed container equilibrates with.
The industry standard, ASTM D8197-22, specifies a range of 0.55 to 0.65 aw for dry flower. Above 0.65, the risk of undesirable microbial growth increases. Below 0.55, routine handling and storage carry a greater risk of physical damage and breakage. The specification also directs that flower above 0.68 aw be dried further. This is an ASTM benchmark rather than a universal regulatory endpoint. Certified or otherwise regulated facilities should use the applicable product specification, validated method, and approved SOP.
Sample properly. Pull from several positions in the room and several depths in the pile. One bud is not a batch.
Secondary indicators and the home-grower proxy
Secondary indicators still earn their place. Small stems that snap instead of folding, a bud that gives slightly under pressure and springs back, and a small sealed jar that holds a stable reading instead of sweating all point in the same direction. Use them to decide when to test, not instead of testing.
Home-grower proxy: Seal a representative sample in a clean jar with a small calibrated hygrometer, leave it several hours in a stable-temperature space, and read the equilibrium relative humidity. A steady reading in the mid-50s to mid-60s corresponds to the aw range above.
Its limits are real, so treat it as a proxy rather than a measurement. Inexpensive hygrometers drift and need salt-test calibration. A reading taken before the sample equilibrates means nothing. Temperature swings move the number. And one jar does not represent a whole harvest.
Your decision: End the dry based on the applicable quality specification not on day seven.
Step 5: Cure to Stabilize, Not to Manufacture Potency
Curing does not create potency. It lets moisture equilibrate from the interior of the flower out to the surface and stabilizes the sealed environment so the batch holds its aroma, flavor, and handling quality through storage.
Postharvest work on two industrial hemp cultivars found that curing increased flower moisture by roughly 3.3 to 13.6 percent, while drying and curing together did not significantly change total cannabinoid content. Decarboxylation and color did shift. Those were hemp cultivars under specific conditions, so generalize carefully.
Container conditions matter for the part your customers actually taste. Work on drying and storage conditions found that drying method and container both affect how well aroma compounds and cannabinoid forms are preserved. Flavor is not only grown. It is kept or lost after the cut.
Use food-safe, clean, high-barrier containers. Glass, food-grade vessels with proper gaskets, and high-barrier cure bags all work when they are clean and sealed correctly. Fill level and handling cadence should follow a written spec approved by your Head of Cultivation, because fill affects headspace, equilibrium speed, and how quickly a problem becomes visible.
Monitor instead of ritualizing. Check aw or equilibrium RH where appropriate, monitor for quality issues, and handle containers according to the applicable procedure. Avoid fixed-schedule opening where it is not part of the approved process.
Your decision: Vent on evidence. If the reading runs high, open the container and dry back briefly. If it reads in range and smells clean, leave it sealed.
Step 6: Store, Troubleshoot, and Know When to Stop

Store in controlled conditions appropriate to the product and packaging specification, limiting exposure to heat, light, oxygen, and moisture swings. Heat, light, oxygen, and humidity swings are what erode flavor over time, and they do it quietly.
Be honest about shelf life. Properly dried and cured flower held in good conditions keeps its quality for months, and aroma fades gradually rather than expiring on a date. Storage conditions matter more than the number of weeks on the label.
Keep post-harvest batch records through storage: batch ID, endpoint results, container type and fill, storage location and conditions, relevant process events, and any corrective action required by the applicable procedure. Records are what turn a bad batch into a fixable process problem.
Quick diagnostic table
What you see: | Likely cause: | Do this: |
|---|---|---|
Drying too fast: crisp outsides, hay smell, brittle stems in a few days | RH too low, air blowing directly on material, load too light for the space | Raise RH toward the starting band, redirect airflow so it moves around the load rather than at it, and reduce excess dehumidification or move the batch to a better-matched space
|
Drying too slowly: material still limp well past the expected window
| RH too high, poor circulation, crowded racks, dense or wet-arriving flower
| Improve spacing and circulation first, then lower RH gradually. Check sensors in the slow corners |
Over-dry flower: shatters on handling, muted aroma, aw below 0.55
| Endpoint missed, late-stage RH drop, over-long hang
| Use an appropriate humidity-control sachet to bring aw back toward the target range. Do not expect lost aroma or handling damage to be restored. Fix the endpoint procedure for the next batch
|
Ammonia or musty odor in the container
| Sealed too wet, elevated water activity, or microbial activity
| Segregate the batch first. Test water activity and assess it under your QA/SOP. If excess moisture is the only confirmed issue and your SOP allows correction, dry back carefully. If the odor persists or contamination is suspected, escalate through QA. Reject if contamination is confirmed or the batch fails applicable testing
|
Condensation on container walls
| Sealed too wet, or temperature swings in storage | Open and dry back to the target range, then move storage to a stable-temperature location |
Suspected mold: gray or white fuzz, dusty spots, sour smell
| Field infection, wet pockets, or a stalled dry
| Segregate the batch, stop cross-room movement, escalate through QA and your SOP. Do not salvage visible portions
|
When mold is suspected
Segregate the batch immediately, stop moving material between rooms, and escalate through QA and your SOP. Do not attempt to salvage the clean-looking portion of an affected batch. Contamination is not limited to what you can see, and a batch that fails testing after being blended into others costs far more than the batch itself. If contamination is confirmed or the batch fails applicable testing, reject it under your QA requirements.
Your decision: Release only batches that meet your moisture and quality standards. When something reads or smells wrong, protect the rest of the operation first: isolate the batch, hold the record open, and let QA clear it or reject it.
Pro note: The finish sets your flavor ceiling
Drying and curing protect flavor. They do not create it. The terpene content you are working to preserve was built during bloom, on a feeding program that either supports terpene expression or does not.
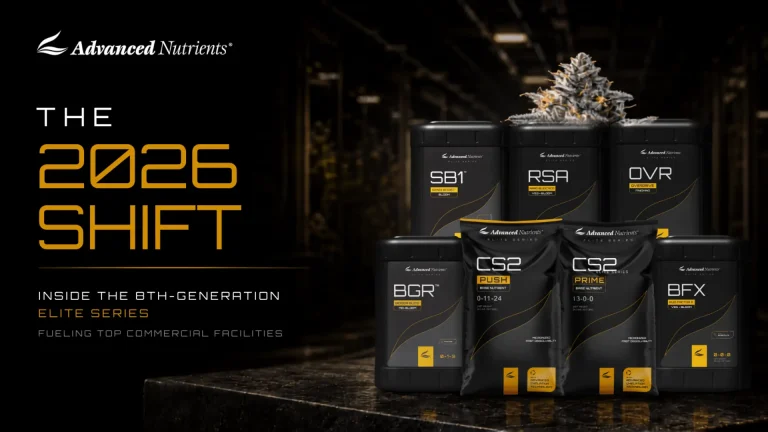
The results growers achieve with Advanced Nutrients show what that looks like in the real world. Most fertilizers were never engineered for cannabis, and in a market crowded with mids, flavor is what gets flower remembered, requested, and paid for.
OVR™ (Overdrive® 2.0) is a zero-nitrogen finisher for the final two weeks before flush, formulated to support flower density and terpene production without nitrogen interference. There is a fuller breakdown in our OVR article.
SB1™ (Sensi Boost™ 1) targets brix, resin, and terpene expression through bloom.
BFX™ uses SAReplex™ to support plant expression and is designed to increase terpene production while fueling yields, potency, and flavor.
Flawless Finish® is a flushing agent built to help purge residual fertilizer salts before harvest.
One caution on flushing. Controlled-environment research on high-CBD cultivars found that longer flushing reduced inflorescence dry mass and CBD yield, with cultivar-specific outcomes, and smoking quality was not assessed. Match flush duration to your cultivar and your goals rather than to habit, and see our guide on how to flush plants for the mechanics.
Your Cannabis Post-Harvest Checklist for Croptober
Before the cut
- Harvest window set from cultivar history, confirmed with multiple maturity markers
- Weather and mold pressure assessed, with an early-harvest trigger agreed in advance
- Trim workflow chosen per batch and staffed
- Dry space sanitized, sensors placed and mapped, capacity matched to incoming volume
- Batch IDs, labels, and transport staging ready before anything comes down
Through the dry
- Dark, gentle indirect airflow, spacing that prevents wet pockets
- Setpoint held steady, temperature and RH logged and reviewed daily
- No aggressive late-stage humidity drop
- Endpoint confirmed against the applicable quality specification; water activity may be used where appropriate. Home growers can use a calibrated jar-equilibrium check as a proxy
- Samples pulled from multiple positions and depths
Cure and storage
- Clean, food-safe, high-barrier containers at an approved fill level
- Aroma and moisture readings logged, venting only when the data calls for it
- Controlled storage appropriate to the product and packaging specification, with oxygen and moisture controlled
- Suspected mold segregated and escalated, never salvaged
- Batch records complete from cut to shelf
Every cultivar, medium, and post-harvest setup behaves a little differently, and no article can see your room. If you want a second opinion on a specific batch, a specific cultivar, or a dry space that is not performing, Advanced Nutrients Grower Support will take the question. Bring your numbers and we will work the problem with you.
You can also join our newsletter for grower guides, cultivation research, and harvest-season resources sent straight to your inbox.
One takeaway to carry into Croptober: measure the batch, not the calendar.